
How to Turn Crochet Flowers Into a Bouquet — Stems, Leaves and Wrapping
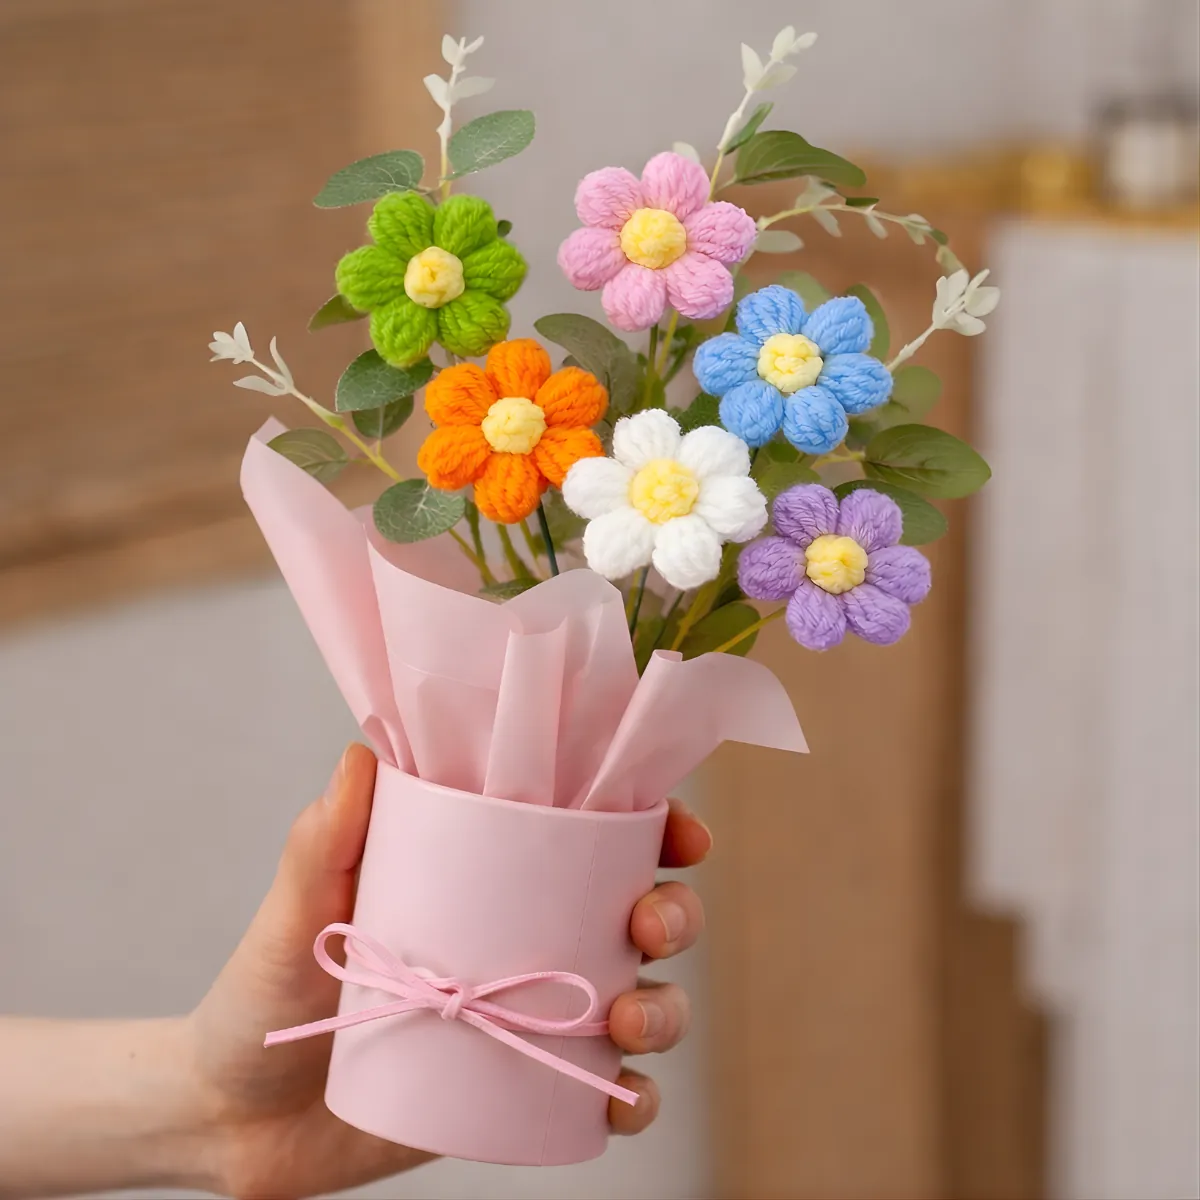
What you need
- Makes: One wrapped bouquet from flowers you have already made
- Yarn: Green DK or worsted for the leaves and stem wrap
- Hook: 3.5 mm (E/4) for DK, 4 mm (G/6) for worsted
- Floral wire (18–20 gauge) or bamboo skewers, one per flower
- Floral tape, or a hot glue gun
- Wrapping paper and ribbon
- Yarn needle and scissors
Abbreviations (US terms)
- ch chain
- sl st slip stitch
- sc single crochet
- hdc half double crochet
- dc double crochet
- st(s) stitch(es)
Nearly everyone underestimates this stage. The flowers are the fun part and they photograph well on a table; the bouquet is what someone actually receives, and it lives or dies on three unglamorous things — stems that stay upright, enough green to break up the colour, and a wrap that holds its shape.
Here is the whole process, assuming you already have flowers made from the daisy, rose or sunflower patterns.
1. How many flowers you need
More than you think, and an odd number.
| Bouquet size | Blooms | Suggested mix |
|---|---|---|
| Small posy | 5 | 1 focal flower, 4 fillers |
| Standard gift bouquet | 7–9 | 2–3 focal, the rest fillers and leaves |
| Full bouquet | 11–15 | 3–5 focal, layered heights |
Odd numbers arrange better because they have a natural centre — even numbers tend to split visually into two halves. Sunflowers and roses are your focal flowers; daisies are fillers. A bouquet of nothing but focal flowers looks crowded and strangely flat.
2. Stems that do not flop
This is where most homemade bouquets fail. A crochet bloom is heavier than it looks, and thread or pipe cleaners will not hold it upright for long.
Use 18–20 gauge floral wire, or a bamboo skewer for a stiffer, cheaper option. Then:
- Push the wire up through the back of the flower until about 1 cm pokes through the centre front.
- Bend that 1 cm over into a small hook and pull it back down so it catches in the stitches. This anchors the flower — glue alone will eventually let go.
- Secure the join with a dab from a hot glue gun or a tight wrap of floral tape.
- Wrap the stem in green yarn: start at the top, hold the yarn tail against the wire, and wind down in tight, slightly overlapping turns. A spot of glue at the top and again at the bottom is all it needs.
Cut the stems to different lengths — the outer flowers shorter, the centre ones longer. Equal-length stems are the reason a bunch looks like a bunch rather than a bouquet.
3. A simple crochet leaf
Green is what keeps the eye from being overwhelmed by colour. Two or three leaves per bouquet is plenty; five if you are working with a lot of white.
Foundation: Ch 9.
Round 1: Starting in the 2nd ch from the hook, work along the chain: sl st, sc, hdc, dc, dc, hdc, sc. Then work 3 sc into the last ch — this forms the point of the leaf.
Now continue along the opposite side of the same foundation chain, mirroring what you just did: sc, hdc, dc, dc, hdc, sc, sl st.
Sl st into the first st to join. Fasten off, leaving a tail long enough to attach the leaf to a stem.
For a pointed, more realistic leaf, work the same round but replace the
3 sc at the tip with (sc, ch 2, sc). For a veined leaf, work a second
round in sc all the way around the first, adding 3 sc at the tip.
4. Arranging the bunch
Work in your hand, not on the table — a bouquet is assembled from the side, but it is judged from the front.
- Start with your tallest focal flower and hold it upright.
- Add flowers one at a time, each angled slightly outward and a little lower than the last, turning the whole bunch a quarter-turn as you go. This spiral is what gives a florist bouquet its dome shape.
- Slot the leaves in last, around the outside and in any obvious gaps.
- Hold the stems where your hand naturally grips them and bind that point tightly with floral tape or a length of yarn. That binding point is the pivot for everything — get it firm before you wrap.
- Trim all stems level, about 8–10 cm below the binding.
5. Wrapping it
Wrapping is the difference between "you made me flowers" and "you bought me flowers", and it costs about ₹30.
- Use two sheets of paper, offset at an angle to each other, rather than one. A single sheet always looks flat.
- Sit the bound bouquet diagonally across the first sheet, fold one side up and across the stems, then the other, and tape at the back.
- Crush the paper slightly at the base where you tie it. Perfectly smooth paper looks like packaging; a little collapse at the tie looks like a florist did it.
- Tie with ribbon over the binding point, and finish with a bow that sits slightly off-centre.
Metallic wrapping paper works well here because it holds a crease — soft tissue paper collapses and hides the flowers.
6. Making it last
Nothing here wilts, but a bouquet can still get shabby:
- Keep it out of harsh direct sunlight; strong sun fades bright yarn over a year or two.
- Dust it occasionally with a dry make-up brush or a hairdryer on cool.
- If a bloom gets squashed in storage, steam it lightly and reshape it with your fingers.
Our care guide goes into this in more depth.
If you would rather skip to the end
There is no shame in it — the assembly is genuinely the least enjoyable part, and floral wire, tape, paper and ribbon add up to most of the cost of a finished bouquet anyway. Ours are hand-crocheted, assembled and wrapped, and they arrive ready to hand over.